Tandoori Turkey Meatloaf
When I think of comfort food, meatloaf is one of the first things that pops into my mind. Growing up, my Mema was famous for her meatloaf- moist and delicious- served with mashed potatoes and drenched in brown gravy made from the drippings. Holy cow, it was good! When a meal in your family is that iconic, its a pretty good rule to not mess with it- so, when I set out to make meatloaf- I went an entirely different direction…toward the flavors of India!
This meatloaf pairs perfectly with a big pile of basmati rice, cooked with golden raisins and sprinkled with chopped nuts. The white meat turkey keeps it nice and lean- the plethora of veggies keeps in moist- and the lovely array of spices keep it interesting!
This dish has become a staple in our house- hopefully your family will love it too!
Tandoori Turkey Meatloaf
1/2 C onion, finely chopped
1/2 C celery, finely chopped
1/2 C carrot, grated (not packed)
16 oz white meat ground turkey breast
1 egg
1/4 C bread crumbs or 1 piece of bread
1/8 C milk
1/2 t sea salt
1/2 t cumin powder
1/2 t tumeric
1 t curry powder
1/2 t ground coriander
2 T tomato paste
1 T worcestershire sauce
Curried Ketchup
4 T tomato paste
1 t cumin
1 t curry powder
1 t brown sugar
1 T apple cider vinegar
2 T water
1/2 t sea salt
Preheat the oven to 425 degrees.
In a medium pan over medium high heat, combine the onion, celery and carrot. Cook until tender…about 5 minutes.
In a large bowl, combine the turkey, egg, bread crumbs, milk (**if you are using a slice of bread, soak the bread in the milk and then crumble it in**), and all of the remaining spices and ingredients. Now, pour the veggie mixture on top. Using your hands, kneed and combine the mixture until all of the ingredients are evenly distributed throughout the turkey.
Prepare a large cookie sheet by spraying it with cooking spray or covering it with aluminum foil. Using your hands, shape and pack the meatloaf.
Now, make your Curried Ketchup topping. In a bowl, combine all of the ingredients and mix well. Using the back of a spoon or a brush, coat the top of your meatloaf with ketchup. Any extra can be reserved for serving!
Bake the loaf at 425 degrees for 30 minutes. Let it rest for 5 minutes before serving!
*To make the rice, combine basmati rice, water, salt and raisins. Cook until tender and then top with your favorite chopped nut!
Posted on May 16, 2012 by LindsayTarquinio · 0 comments Read MoreSpring Chicken Salad
I will interrupt my travel tales to share a quick recipe with you- because I’m really excited about this one! When Spring is in the air, I absolutely love packing a simple little picnic, driving over to Piedmont Park, and having and outdoor dinner followed by a long walk around the park. Picnics and Springtime are one lovely combination…and the easiest way to create a lovely picnic is to have a sandwich be the star of the show.
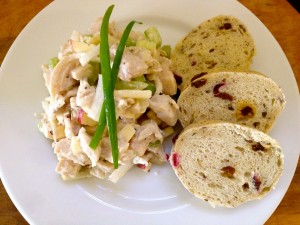
I’m not talking about a boring turkey on white here- I’m talking about a delicious flavor explosion served with toasted cranberry walnut bread (or whatever bread/ lettuce wrap is your favorite)- it is the perfect, quick and easy picnic entree or grab and go lunch.
This chicken salad is mayo-free and therefore MUCH healthier than any store bought/restaurant purchased alternative….I promise, you won’t miss the added fat at all…its creamy and delicious and full of light Spring time flavors! I like to make a big batch at the beginning of the week and have it as a quick healthy snack or lunch that’s ready to go in the fridge.
Spring Chicken Salad
2 lb chicken breast
1 t garlic powder
1 t sea salt
1/2 C celery, chopped
1/4 C sweet onion, chopped
1/2 C apple, chopped
1/2 C green grapes, quartered
1/4 C walnuts, chopped
1/2 C 0% plain greek yogurt
2 T dijon mustard
2 T 1/3 less fat cream cheese, softened
1/2 t sea salt
1 t fresh cracked black pepper
1/4 C green onion, chopped
Preheat the oven to 375 degrees. Place your chicken in a glass baking dish (the kind with sides) and sprinkle the breasts with salt and garlic powder. Drizzle about 2 T of water in the dish and cover with aluminum foil. Bake for about 25 minutes- until chicken is cooked through.
When the chicken is cooked, remove it from the oven and allow it to cool. While it is cooling, chop the other ingredients. When the chicken is cool, chop it into small pieces.
In a large bowl, combine the chicken, celery, onion, apple, green grapes, and walnuts.
In a separate bowl, combine the greek yogurt, dijon mustard, cream cheese, sea salt and black pepper. Whisk until smooth and then stir the mixture into the chicken.
Top it with green onion and stir to combine.
Now, all you have to do is dust off your picnic basket, choose your favorite bread and head the the park! If you’re looking for a few other treats to complete your picnic- here are a few ideas:
Appetizer: Fancified Deviled Eggs
Side: Field greens tossed with Seasoned Rice Vinaigrette
Dessert: Cashew muffins with Coconut Crumble
Baked and Stacked Eggplant Parmesan
Eggplant is a very controversial veggie around our house. I absolutely LOVE it and Gavin thinks it is terrible! If I ever get to eat eggplant, its because I slice it up, season it, and throw it under the broiler as a side dish to my dinner…it is never the star of the meal around here. BUT, I absolutely love the smokey, earthy flavors of delicious eggplant and I just had to try to sneak it in to a meal and win Gavin’s heart for this beautiful purple plant.
The best way to sneak something past a guy that grew up in the South in an Italian household? Bread it, fry it and cover it in marinara and cheese! (Or in my case, create a healthy version of an old favorite!) Baked and stacked eggplant parmesan.
When I set the plate in front of him, he was a little hesitant…but once he cut into the golden, yummy crust and took a bite, I knew he could no longer deny that eggplant CAN taste good! He ate it all…and so did I- I really wish the pictures turned out better…it is a beautiful dish and it would be such a fun and easy entree for a dinner party. Its healthy and yummy and tastes like the old classic!
Baked and Stacked Eggplant Parmesan
4 servings
For the Eggplant:
1 C bread crumbs
1 t dried oregano
1 t sea salt
1 egg
1T water
12 3/4″ thick slices of eggplant
For the Sauce:
15 oz can of petite diced tomatoes
1 T basil
1/8 t ground thyme
1/2 t dried oregano
1 clove garlic, minced
1/2 t sea salt
Topping:
1/2 C grated parmesan cheese
Preheat the oven to 375 degrees. Set out two plates. On one plate, combine the bread crumbs, oregano and sea salt. On the other plate, crack the egg and add the water…whisk gently with a fork.
Now, coat both sides of each piece of eggplant with the egg mixture and then coat each side in the bread crumb mixture. Place the eggplant on a bakers cooling rack and then place them in the oven. Bake for 30-35 minutes- until the eggplant is cooked through and the breadcrumbs and crispy and golden.
While the eggplant is baking, in a medium pot over medium heat, combine all of the sauce ingredients. Bring the sauce mixture to a boil and then reduce heat to low and allow to simmer until the eggplant is cooked.
To assemble the dish, place one slice of eggplant on each plate and top with 1 T sauce. Repeat until it is 3 layers high. Top with grated parmesan cheese. Serve with whole wheat pasta!
Panzenela- crispy bread and fresh veggies!
Spring has sprung!! This weather is so amazing and Gavin and I are loving spending time outside- going for walks, starting to learn how to do yard work (oh my, it is complicated!) and best of all, eating meals outside on the patio. If you can see past the yellow haze in the air from the 9,000,000 particles of pollen in the air, the weather is PERFECT for dining al fresco!
When I think about Spring time and Spring foods, I think of fabulous crisp vegetables and lovely citrus-y dressing…and after our lovely meal at the Viking Cooking School with our friends Chris and Michelle, I think of panzenela salad.
The version that we made at the school was delicious- though we might as well have eaten a cheese burger because of the amount of butter on the bread and oil in the dressing. So, since I like to think of a salad as a healthy, veggie filled alternative to a cheese burger- I set out to make a lighter version of this delicious salad.
Panzenela Salad
6 servings
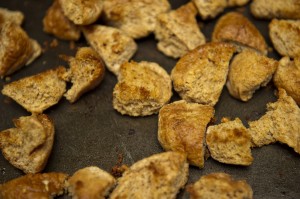
3 C day old whole wheat bread, cut into 1 ” chunks
olive oil cooking pray
2 cloves minced garlic
1/2 t sea salt
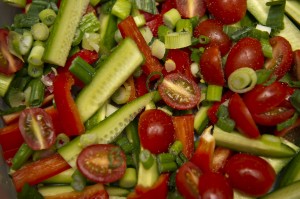
2 C red bell pepper, cut into 1″ pieces
2 C English cucumber, sliced and cut into quarters
1 C tomato, seeded and cut into 1″ pieces
1/2 C green onion, chopped
2 lemons, juiced
1/2 t sea salt
1 T olive oil
1 t fresh basil, chopped
1 t fresh mint, chopped
*crumbled feta, optional
*avocado, optional
Preheat the oven to 350 degrees. Spray a cookie sheet with olive oil spray. Place bread pieces on the cookie sheet and spray the top with olive oil. Toss in the garlic and salt and place in the oven to toast for about 15 minutes.

In a medium bowl, combine all of the other ingredients and toss together. To serve, place a 1/2 C of bread on each plate and then top with 1 C of the vegetable mixture.

Top salad with crumbled feta and avocado, if desired.

